Category: Uncategorized

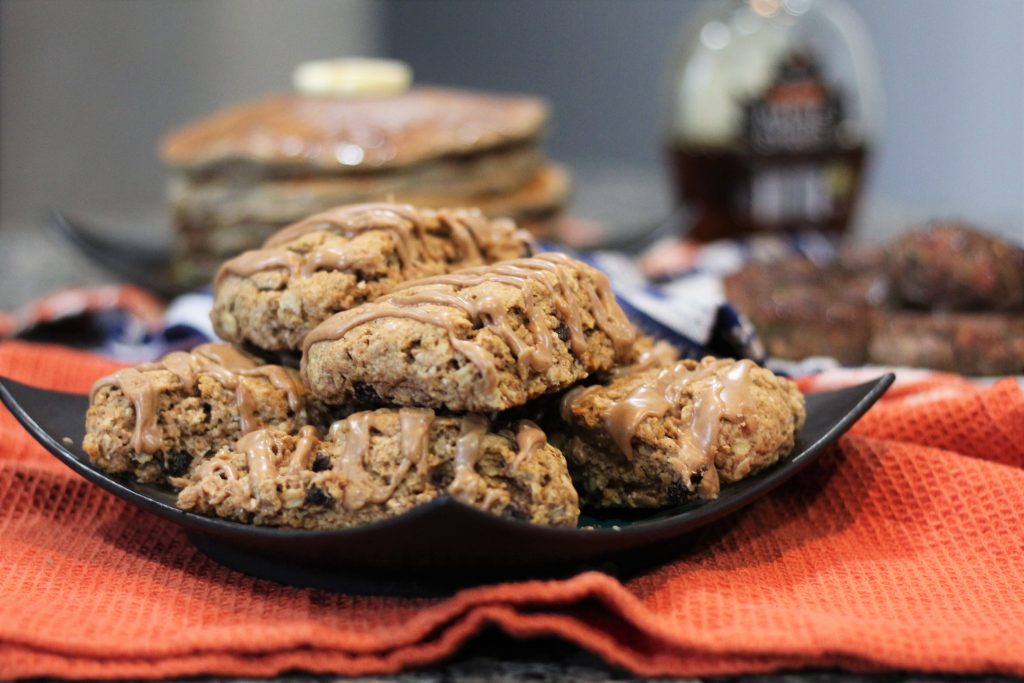
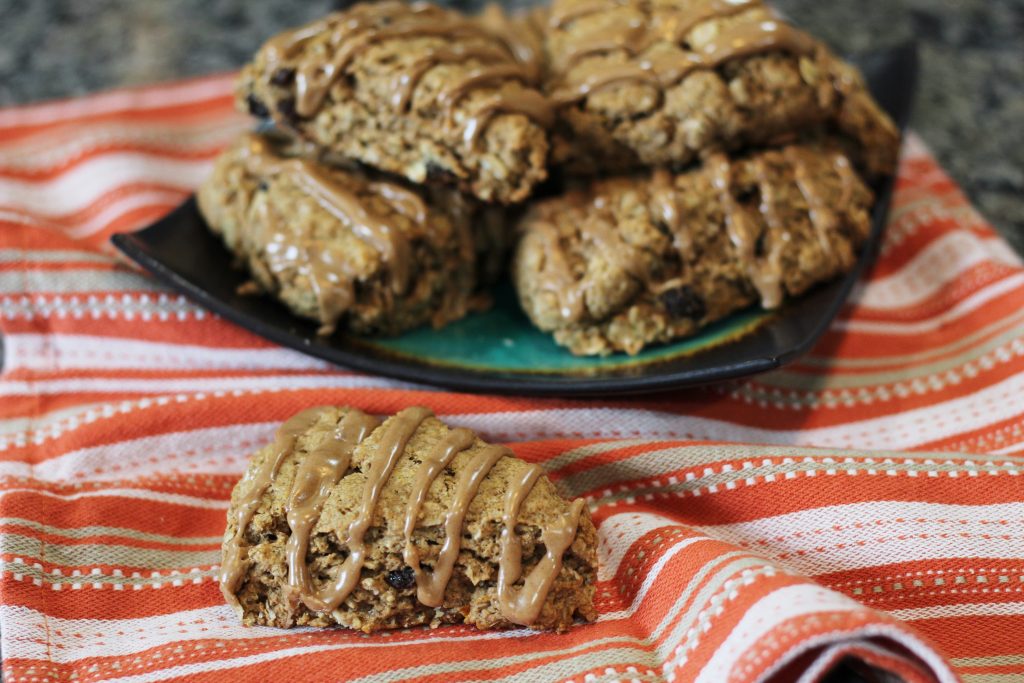
The crew spends a lot of time during episodes 23 and 24 having breakfast. One of said breakfast items was scones. Some were certainly regular cream scones served with butter and jam, but some were probably heartier, like these Oatmeal Rum-Raisin Scones.

The scones piled on a plate. Pancakes, maple syrup, and sausages are out of focus in the background.
Breakfast is ready!

These scones are made with a mix of all-purpose flour, whole wheat flower, and oats. This creates a wonderful hearty flavor and a chewy texture. Brown sugar adds sweetness, and cinnamon, nutmeg, and cloves add a warm spice. Orange zest brings a hint of freshness and prevents these from tasting flat.

All the ingredients measured out into small bowls.
The ingredients

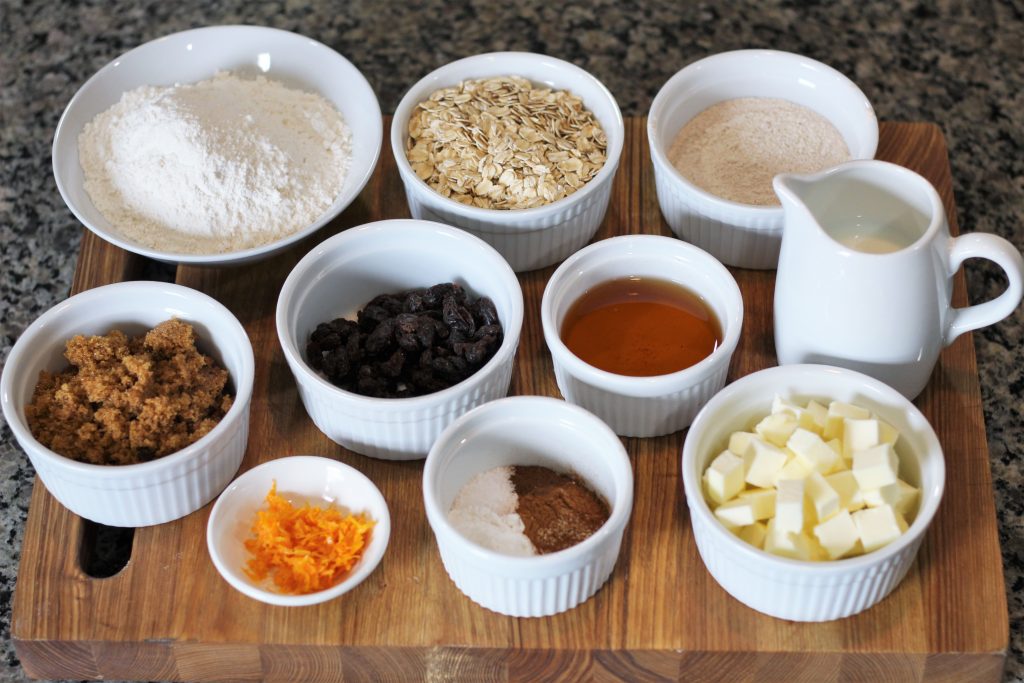
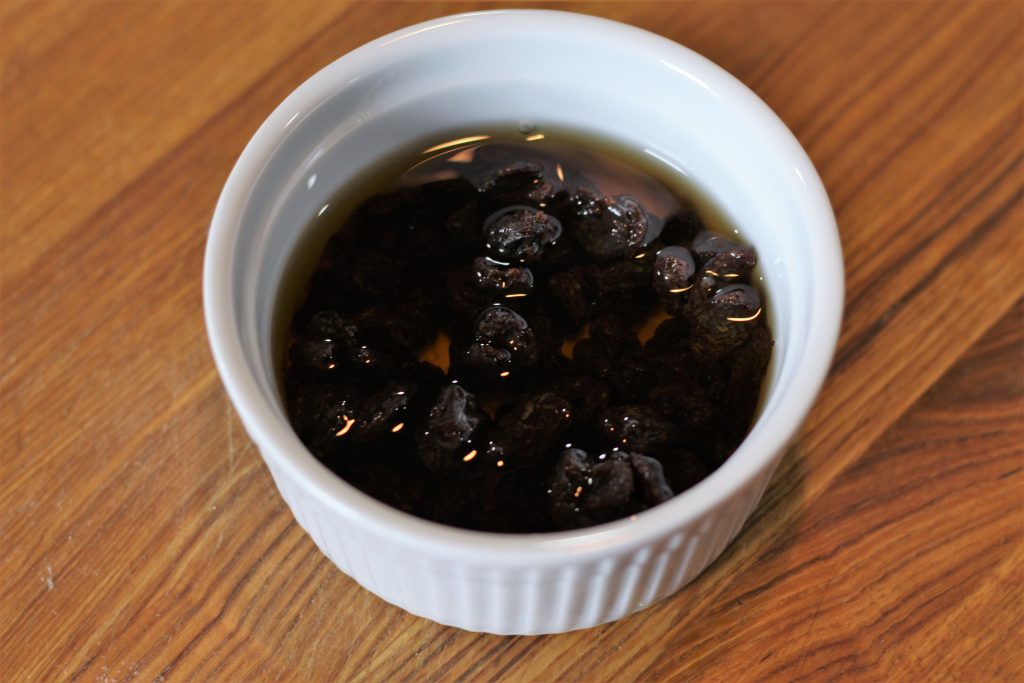
The real secret in letting the raisins soak in spiced rum. This plums them up and adds some extra flavor.

If you don’t wish to or cannot use rum, apple juice or cider would work as well.

These will sit for an hour and get nice and plump.

Rum poured into the bowl of raisins.
Rum-Raisins in the making.

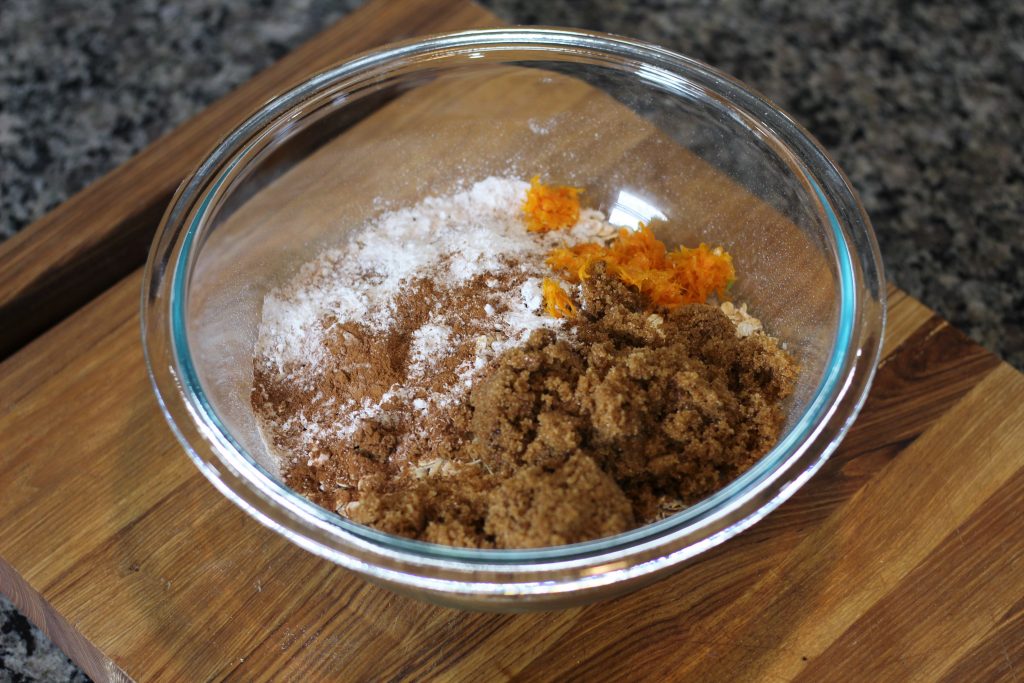
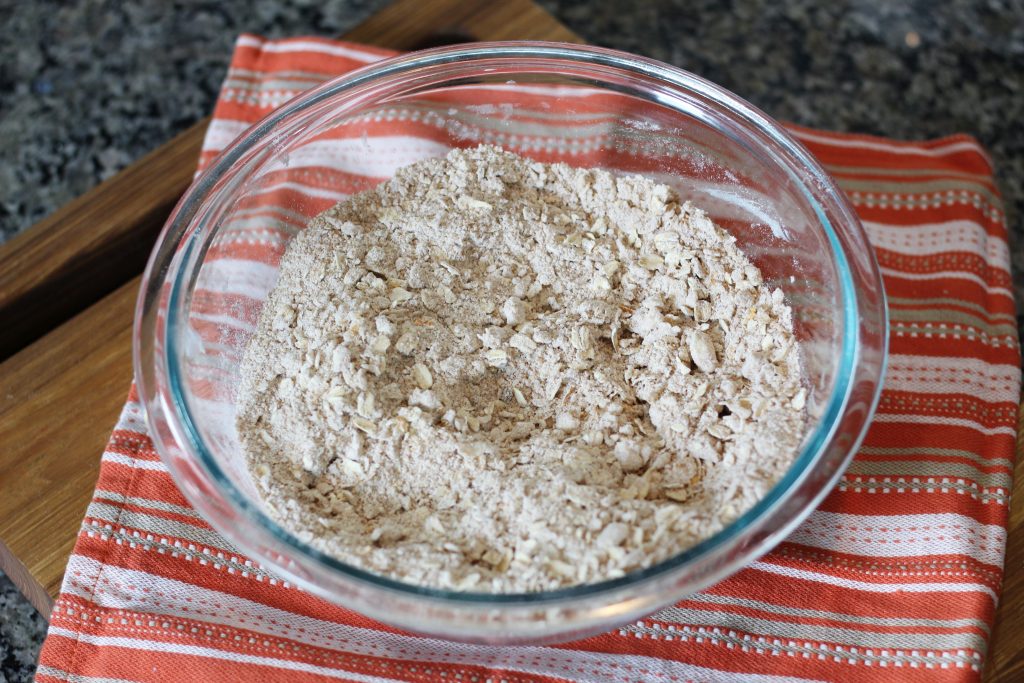
When the raisins are almost done soaking you’ll combine all the dry ingredients in a large bowl and give them a good mix.

All the dry ingredients combined in a large mixing bowl.
The dry ingredients.

Then you’ll add the cubed butter. You’ll want the butter to stay as cold as possible for the best texture. If the butter gets too warm into melt into the flour and create a doughy texture instead of light and crumbly.

Cubed butter adding to the mixing bowl of dry ingredients.
Add the butter.

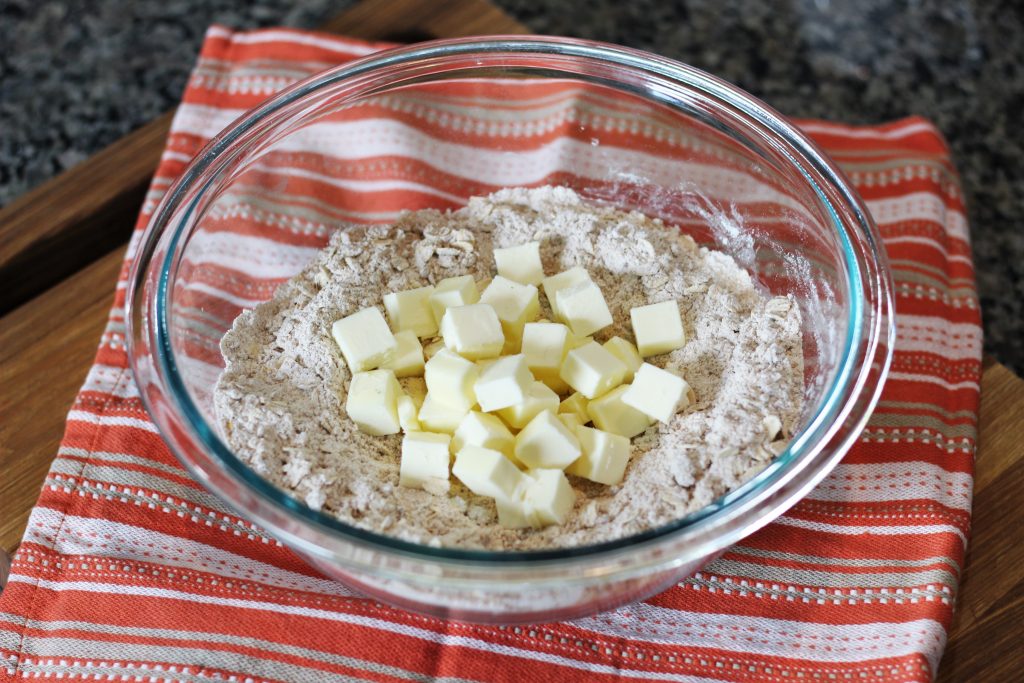
You’ll “cut” the butter into the flour mixture by cutting it up into small pieces. You can do this with a pastry cutter, a handle with thin wires or cutters, or you can use two butter knives and slice at the pieces of butter.

The final butter pieces should be very fine and blended into the mixture.

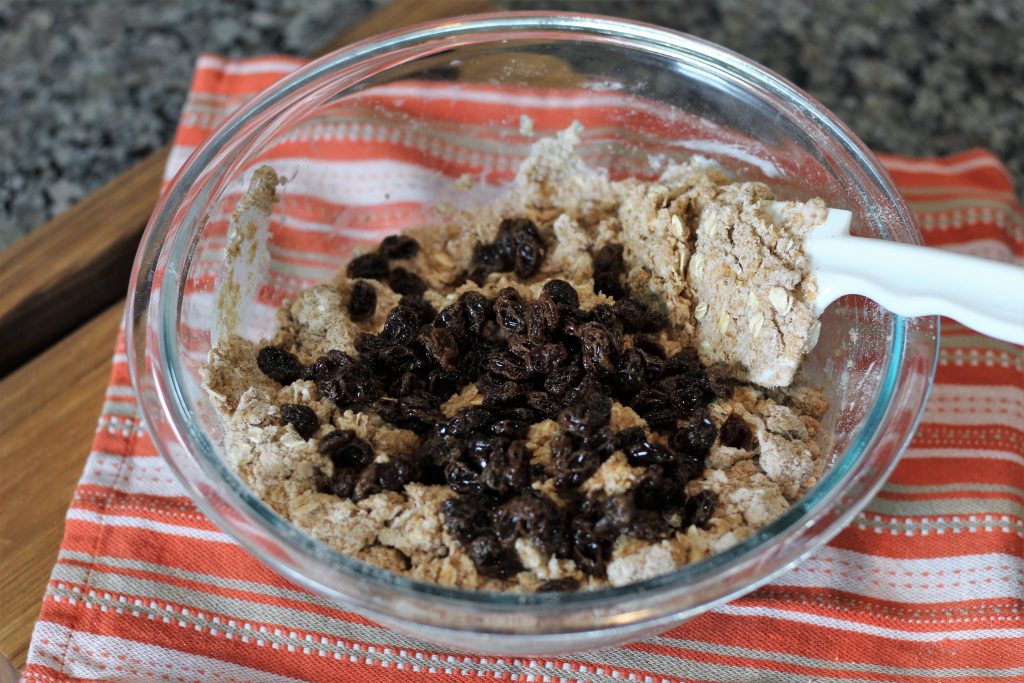
Then you’ll add the buttermilk and stir just until the dough begins to form. Drain the raisins, you can use the leftover rum for whatever you’d like, and add to the dough. Continue stirring until the dough is mostly combined.

Raisins added to the dough.
Raisins added.

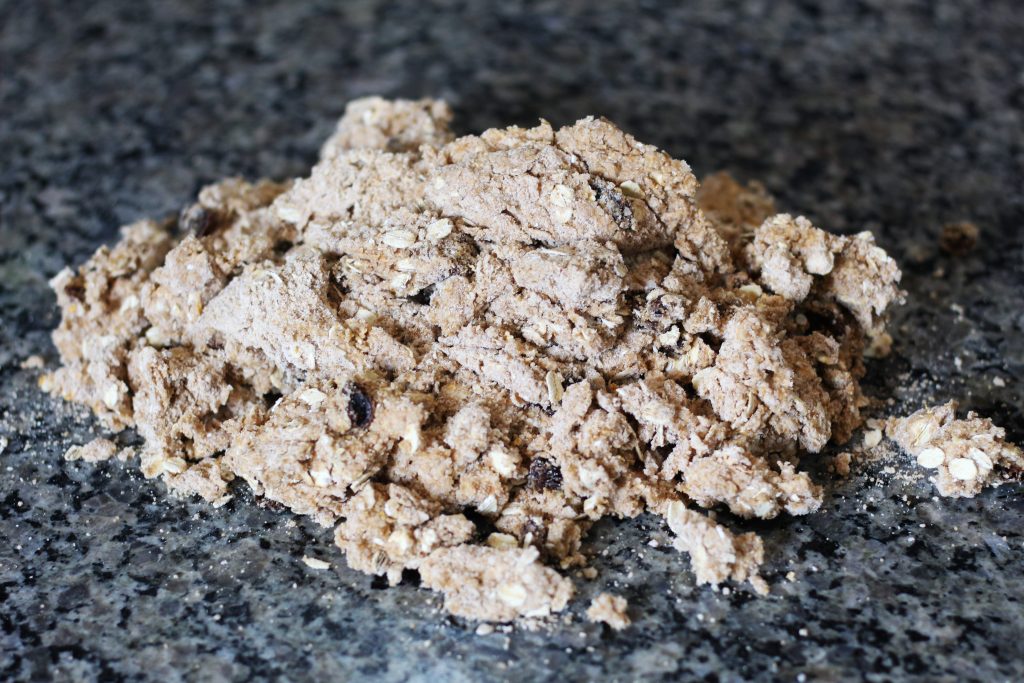
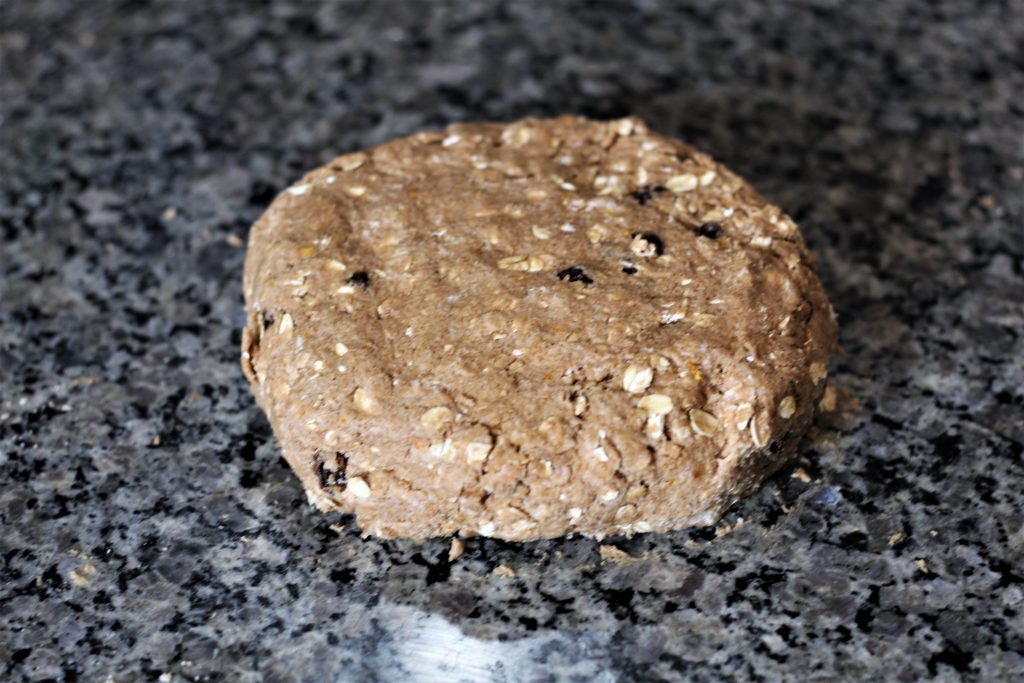
Next, you’ll pour out the dough on a flat surface, with some extra flour to prevent sticking, and knead until the dough is fully mixed and cohesive.

Dough turned out onto a surface for kneading.
Time to knead!

Form it into a flattened disk about 2 inches tall.

The dough formed into a flat round.
The final dough.

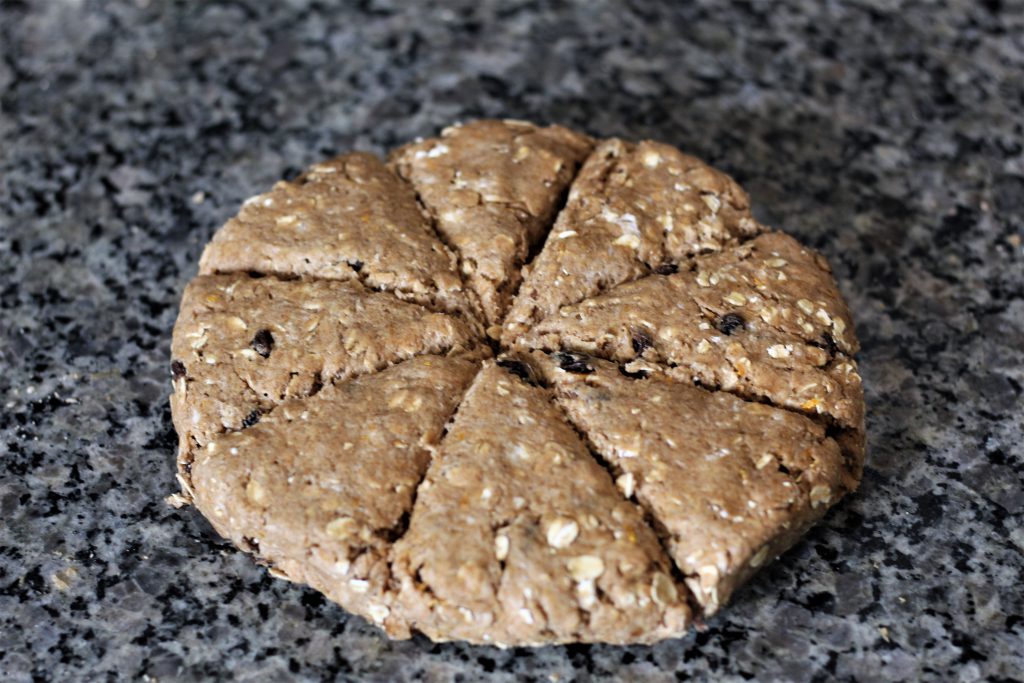
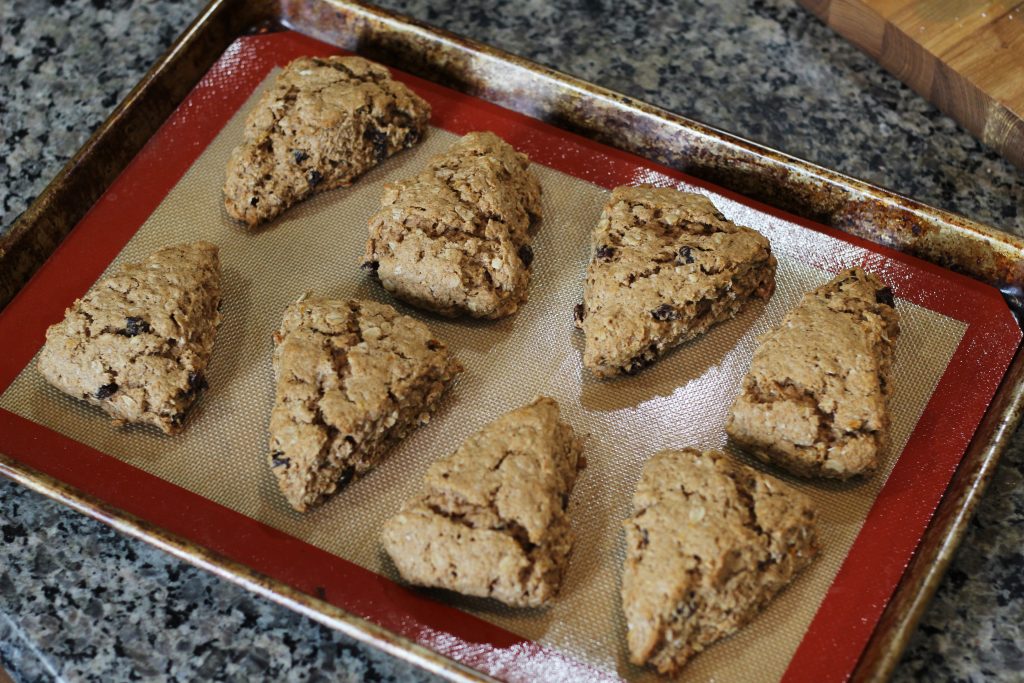
Cut the dough into 8 equal pieces.

The dough divided into 8 triangular pieces.
Divided up.

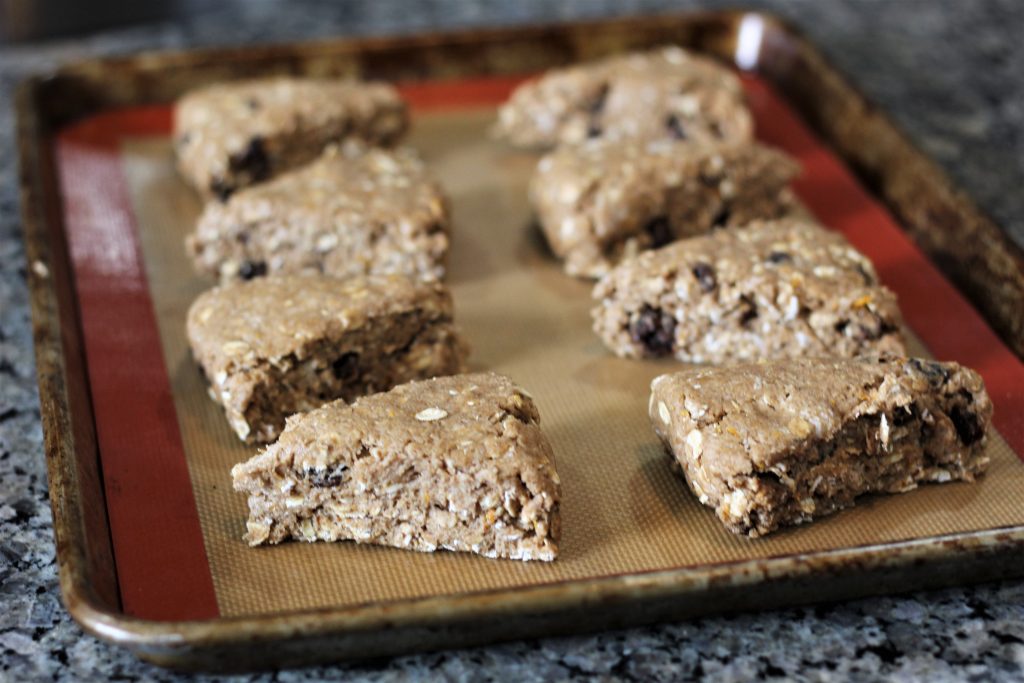
Place the scones on a lined baking sheet and put them in the 400 degree F oven for 15-20 minutes.

The scones on a baking sheet.
Baking time.

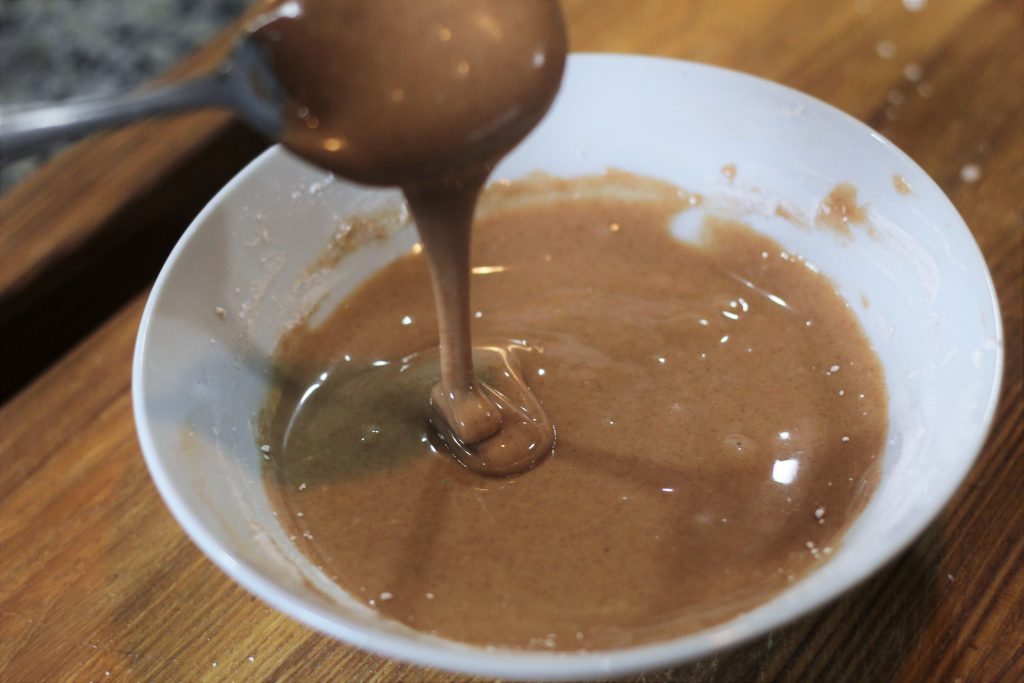
While the scones are baking you’ll make the cinnamon-maple glaze. It’s quite simple. Powdered sugar, cinnamon, maple syrup, and salt, with a little bit of water to smooth it out.

Glaze ingredients in a bowl.
Glaze ingredients.

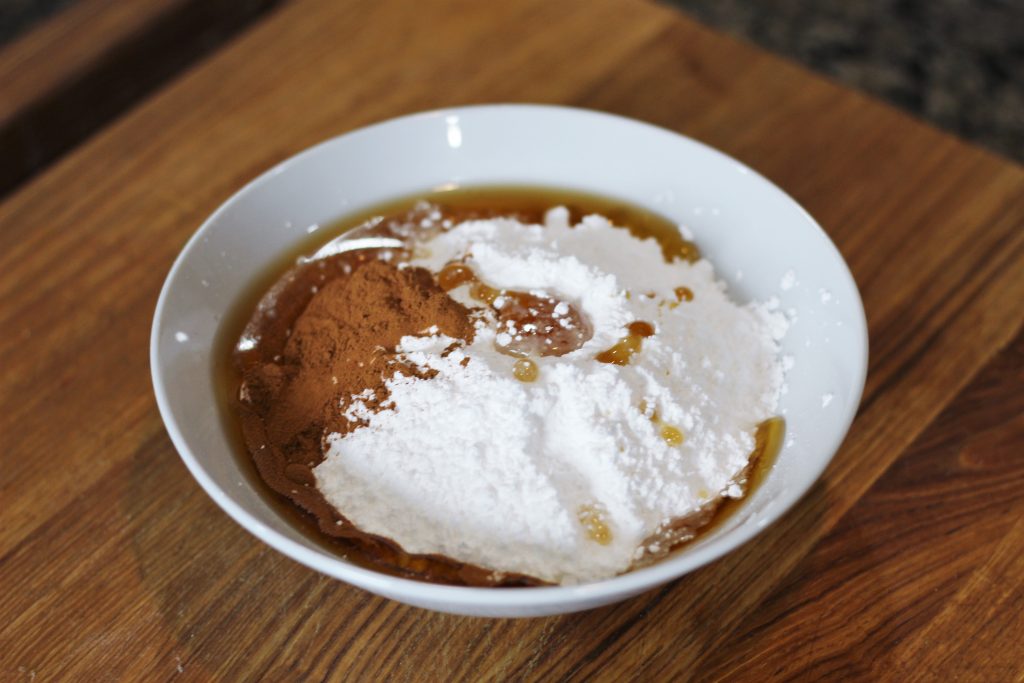
Add the water a teaspoon or two at a time until the glaze is thick, but pourable. It should pool up when drizzled back into the bowl, but after a second or two melt back in with the rest of the glaze.

The mixed glaze with a spoon drizzling some back into the bowl.
The mixed glaze.

The scones should be a wonderful golden color when they are done baking.

The baked scones on the baking tray.
The baked scones.

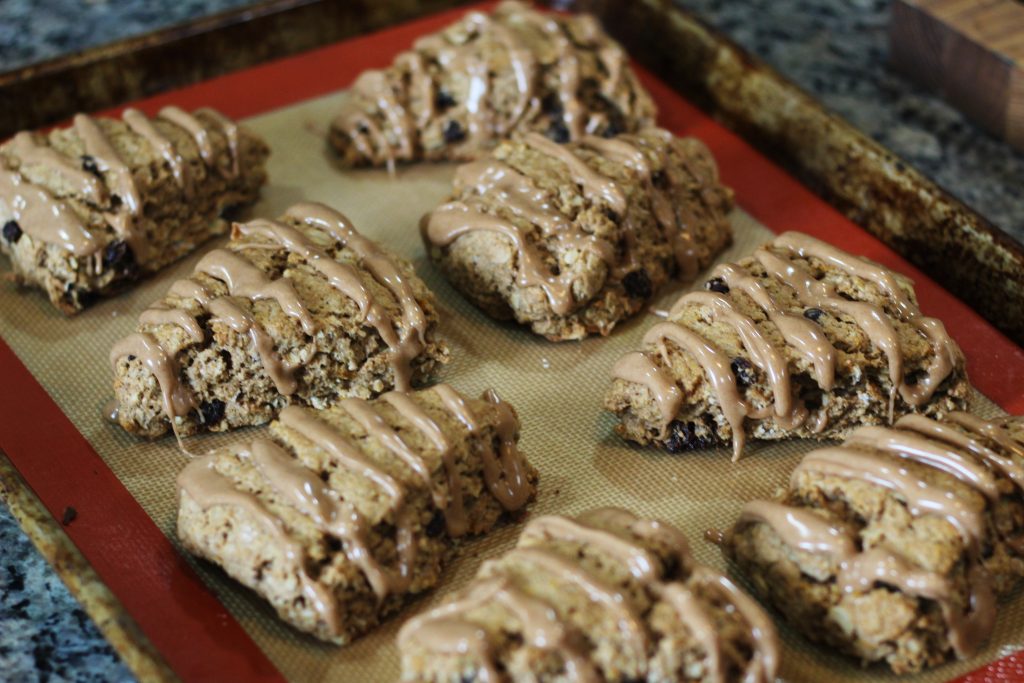
Wait 10 minutes before glazing. This lets them cool down enough that the glaze won’t completely melt away, but lets them be just warm enough for the glaze to fully stick.

An R2-D2 kitchen timer set to 10 minutes.
Other kitchen timers will do.

Drizzle the glaze on in thick stripes or zig-zags. I used a butter knife, but you could also use a spoon or even a piping bag.

The scones on the baking tray with the glazed drizzled on.
That good, good drizzle.

Oatmeal Raisin Scones [makes 8 scones]

1/2 cup (90g) raisins
Spiced rum (or apple juice/cider)
1 1/2 cups (192g) all purpose flour
1/2 cup (64g) whole wheat flour
1 cup  (100g) oats
1 tablespoon baking powder
1/2 teaspoon baking soda
1/2 teaspoon salt
2 teaspoon cinnamon
1/2 teaspoon nutmeg
1/4 teaspoon ground cloves
1/2 cup (100g) brown sugar
Zest of 1 orange
1/2 cup cold butter, cubed
3/4 cup (180g) buttermilk

Place the raisins in a small bowl and fill with enough rum to just cover them. Cover and let sit for an hour.

Preheat the oven to 400 degrees F.

In a large bowl combine the all purpose flour, the whole wheat flour, the oats, baking powder, baking soda, salt, cinnamon, nutmeg, ground cloves, brown sugar, and orange zest. Mix well.

Add the cubed butter to the bowl. Using a pastry blender or two butter knives, cut the butter into the flour mixture until the butter is evenly distributed.

Add the buttermilk and roughly mix until just beginning to combine. Drain the raisins and add them to the bowl. Stir until mostly mixed. Place dough on a lightly floured surface and knead until smooth and cohesive.

Form the dough into a flattened circle about 2 inches tall. Cut into 8 equal pieces. Place the scones on a lined baking sheet.

Bake for 15-20 minutes.

Let cool for 10 minutes before glazing; recipe below.

Cinnamon Maple Glaze

1 cup powdered sugar
1 teaspoon cinnamon
2 tablespoon maple syrup
A pinch of salt
1-2 tablespoon water

Mix together the powdered sugar, cinnamon, maple syrup, and salt in a bowl. Slowly add water, a teaspoon at a time, until the glaze is smooth and pourable, but still thick.

A plate of scones sitting on a fabric napkin. One scone is off the plate sitting on the napkin.
Time to wrangle up for nerfs!

The crew of the Afternoon Delight have eaten many cups of instant noodles. They’re tasty, perfect for spending days in hyperspace, and you can have original or spicy. They first appear in Episode 14 when Xianna makes a few cups for everyone.

While the following “recipe” isn’t as shelf stable as cup noodles and it isn’t quite as instant, but they’re much better tasting and still pretty fast.

“Recipe” is in quotations because what follows is less of a specific recipe and more of a set of guidelines. There’s a lot of ways to customize your specific noodles.

noodles and broth in a glass container. kettle in background.
A finished jar of *Almost* Instant Noodles.

These noodle cups can easily be stored in the fridge for a few days and handle being at room temperature for a few hours, which make them great for office lunches. You can even make them with all dry ingredients for shelf stable cups that should last at least a few weeks.

You’ll want a 16-ounce container that is heat-proof since you will be adding boiling water. Large mason jars or wide-mouth preserving jars work great.

Let’s start at the bottom with the soup base. You can use bouillon paste, a bouillon powder, or even powdered soup mix. If you want to use bouillon cubes you’ll want to smash them up a bit before adding. They dissolve better that way. You’ll want to use 1-2 servings of whatever soup base you use, depending on how strong you like your soup.

We’re using Better Than Bouillon paste in their Vegetable flavor and adding 3 teaspoons, about 1.5 servings worth.

Then you’ll want a “flavor boost”. Something to give your cup a little extra flavor and depth. This could be soy sauce, chili paste, miso, fish sauce, curry paste. Anything that will add something a little extra to the soup. You can even combine them. How much you add will depend on which you choose and personal taste. If you’re going completely shelf stable then omit the “flavor boost” and just add a bit more powered base.

four glass containers with various "soup bases" and "flavor boosts"
Soups bases and “Flavor Boosts”. Left to Right: Bouillon paste, miso, chili paste; Bouillon paste, chili paste; Bouillon paste, soy sauce; Bouillon paste, miso,.

Next, the vegetables. There’s a lot of options for this step. Kimchi is a great choice, carrots and peas are common in many noodle cups along with
dried shiitakes, freeze-dried vegetables are great, fresh or frozen edamame works, basically anything you can think of. You do want whatever you add to require minimal cooking, since they will only get a short soak in hot water. So raw onions may be a bad idea.

Now we’re at the strangest option: beef jerky. Since we want these sit in a fridge for a few days, at a desk for a few hours, or even on the shelf for a few weeks, raw meat is a bad idea. It also probably won’t be cooked by just a few minutes in hot water. But if you’re looking to add something meaty to your cups jerky is the way to go. It lasts for a long time, and when it reconstitutes in the water it softens up and gains a pleasantly chewy texture. You can even play around with what flavor you use. We used a “Hot & Spicy” jerky.

The four glass jars with various vegetables and jerky added.
The veggies and jerky. Left to Right: Jerky, dried shiitakes; kimchi; kimchi, dried shiitakes; jerky.

And now, we have come to the noodles. You can use precooked wheat noodles, such as udon, Lo Mein, or even spaghetti noodles. You can also use “fast-cooking” dried noodles, which are basically the noodles that come in ramen packages and commercial noodles cups without all the extras. Rice noodles are also a great option since most only take a few minutes to cook. There’s rice vermicelli, flat “pad thai” noodles, pho style noodles, and many more. The vermicelli styles can be rolled or folded into little nests that can fit into the jars. Long, straight noodles may have to be cut in half to fit into the container.

Finally we have green onions or chives. These add a little fresh pop that ties everything together. You can use fresh or the freeze-dried kind that you can often find in the produce section.

The four glass jars with various noodles added.
The noodles and green onions. Left to Right: dried vermicelli; cooked udon noodles; cooked udon noodles; fast-cooking ramen noodles.

Then, whenever you want your noodles, simple add boiling water, close the lid, and let sit for 3-5 minutes. Then, give it a good stir and you’re all set!

A noodles jar with boiling water added.
Boiling water added.
A noodle jar after it's 3-5 minute wait.
After 3-5 minutes. It’s noodle time!
A close up of the prepared noodle jar with noodles, jerky, and shiitakes.
Look at that soupy goodness.

Almost Instant Noodles
Per Container:

1-2 servings base (bouillon paste, bouillon powder, powder soup mix)
2-4 teaspoons flavor boost (soy sauce, chili paste, miso, fish sauce, curry paste)
Vegetables (kimchi, dried mushrooms, freeze-dried vegetables, diced, julienned, or small fresh vegetables)
Beef jerky, optional, torn into bite sized pieces
Noodles:
3-4 ounces precooked wheat pasta
2-3 ounces “fast-cooking” dried wheat noodles
1-3 ounces dried rice noodles
Sliced green onion or chives

In the bottom of a 16-ounce heat-proof container add 2 servings of the base, the flavor boost, vegetables, and jerky, if using. Place noodles on top and then the green onions or chives.

When ready to eat, fill the container almost to the top with boiling water. Loosely set lid on top and let sit for 3-5 minutes. Stir to combine.

A close up of the prepared noodle jar with noodles, jerky, and shiitakes.
Tasty noodles.

Scroll to top